
There is a moment on every Puget Sound map when the shape resolves. Two long arms of water opening north toward the Strait of Juan de Fuca, a spine of islands down the middle, and a South Sound that splits into inlets like fingers pressed into the land. It may be the most recognizable coastline in the Pacific Northwest, and it makes an unusually good piece of wall art.
The maps in this post are real exports from the Carto-Art editor, not illustrations. Each one keeps a complete composition — framing, palette, typography, and title — behind a link that opens the exact view. Move it, recolor it, rename it, and download the result for printing. The map data comes from OpenStreetMap, and the exports keep that attribution in the image.
Where Puget Sound begins and ends
Puget Sound is part of the Salish Sea, the inland marine system that also takes in the Strait of Juan de Fuca and the Georgia Basin. Oceanographers define it as the waters extending landward from Admiralty Inlet, roughly 161 km (100 mi) to Olympia at its southern end. (About Puget Sound — US EPA) (Puget Sound's physical environment — Encyclopedia of Puget Sound)
That single sentence contains the whole design problem. The sound is long, narrow, and folded back on itself, so the framing you choose decides what the poster is actually about: the overall silhouette, a city and its lake, or the crossing between an island and downtown.
Three ways to frame the sound
A whole-sound map shows how the basins, islands, and peninsulas fit together. A closer view gives more space to the city streets and shorelines you know. Every composition below has a Customize link that opens it in the editor, ready to adjust.
The whole sound — for a recognizable silhouette
This composition runs from Olympia and the South Sound up past Seattle to the Whidbey Island area. The Strait of Juan de Fuca and the San Juan Islands sit outside the frame, which keeps the inlets and islands large enough to read on paper.
Keep the Sound in view from the South Sound up toward Admiralty Inlet, with a little room around the edges. Try portrait framing first: the Sound runs north to south, so a tall poster follows its shape.
Seattle and the Eastside — for the city and the lake
Start with Elliott Bay, Lake Union, Lake Washington, and Mercer Island in view. This framing keeps Seattle, Bellevue, Kirkland, and Redmond together; a tighter crop brings one neighborhood and its surrounding streets forward. The Eastside cities sit across Lake Washington from Seattle.
A landscape composition gives the lake and the city more room across the page while keeping both shores in the frame.
Bainbridge Island and the Kitsap Peninsula — for the crossing
Frame Bainbridge Island, its north-end communities, and the Kitsap Peninsula together, with the Seattle waterfront along the right edge. The water between Winslow and downtown Seattle is the crossing used by the Seattle–Bainbridge ferry, and the map shows the shorelines on either side of it. (Washington State Ferries — WSDOT)
A closer crop of Winslow and Eagle Harbor is a good option when the map is about a particular home or stay; that is the treatment used for the personalized example further down.
Shoreline, roads, or terrain: choosing a treatment
Framing decides where the poster looks. The treatment decides what the poster is made of. All three versions below use the same extent and the same title size, so only the material under the title changes — which makes them easy to compare side by side.
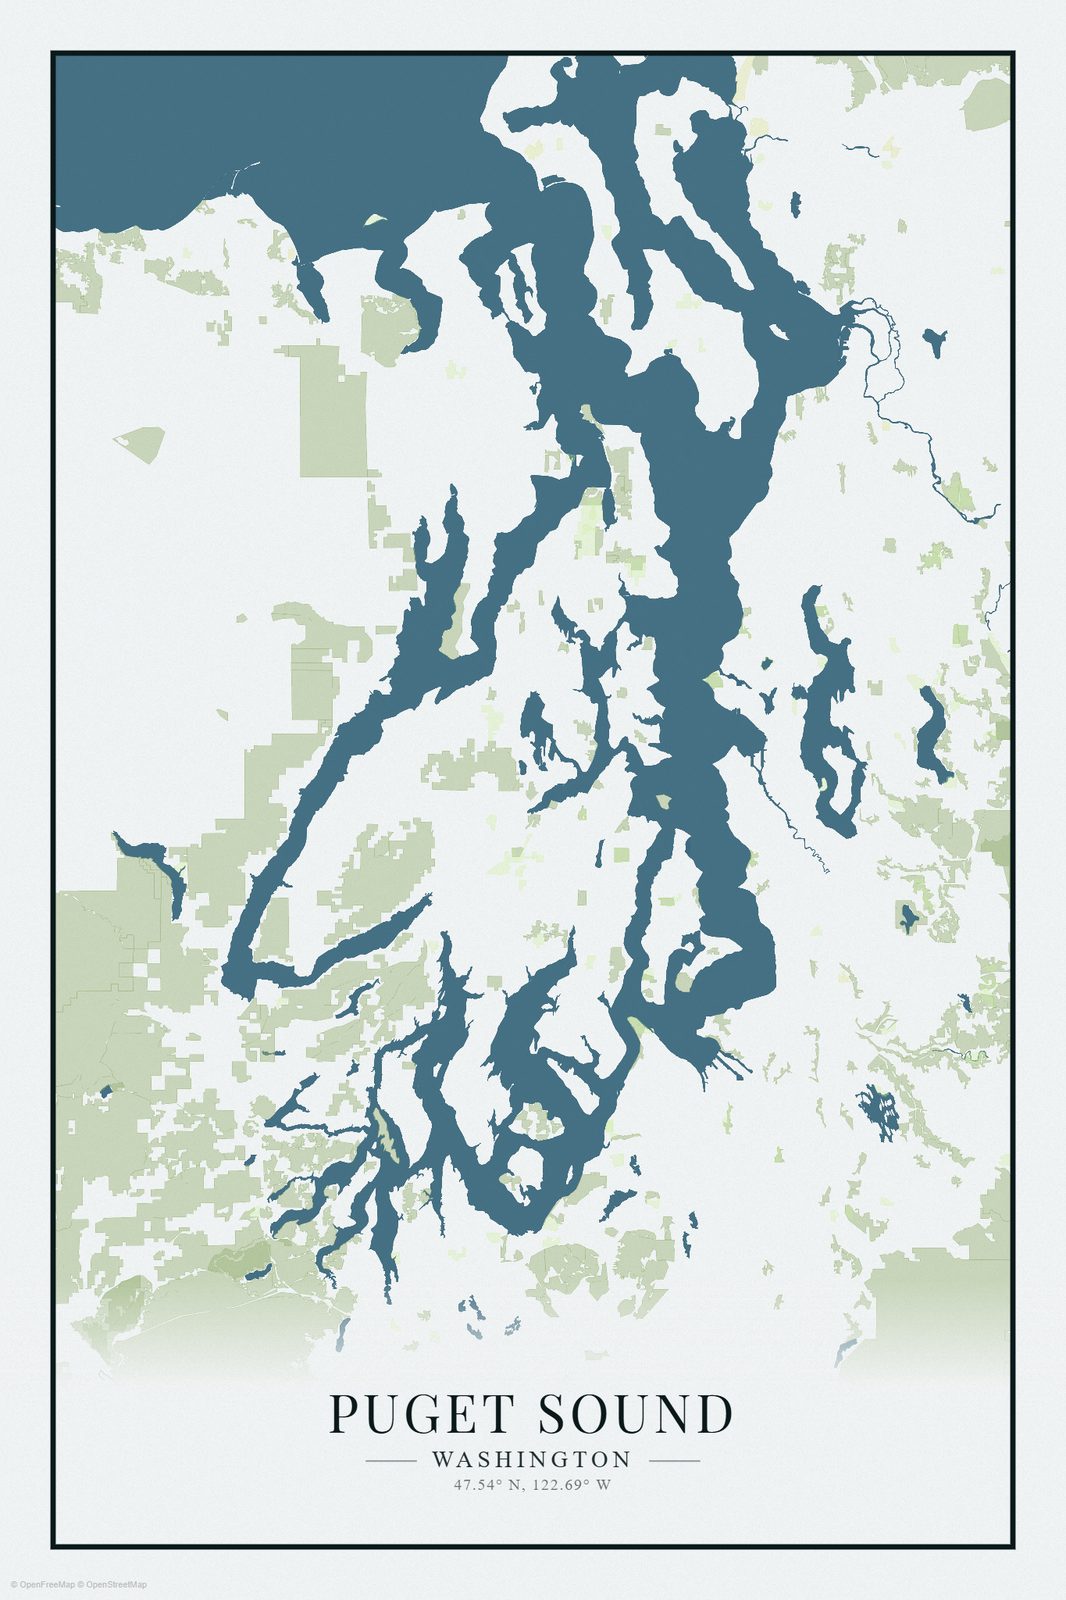
Minimal shoreline: the shape itself
The shoreline treatment emphasizes the shape of the sound and the contrast between land and water. Nothing competes with the outline, so the islands, inlets, and peninsulas do the talking. Before downloading, check that the features you care about are still readable at poster size.
Open the shoreline map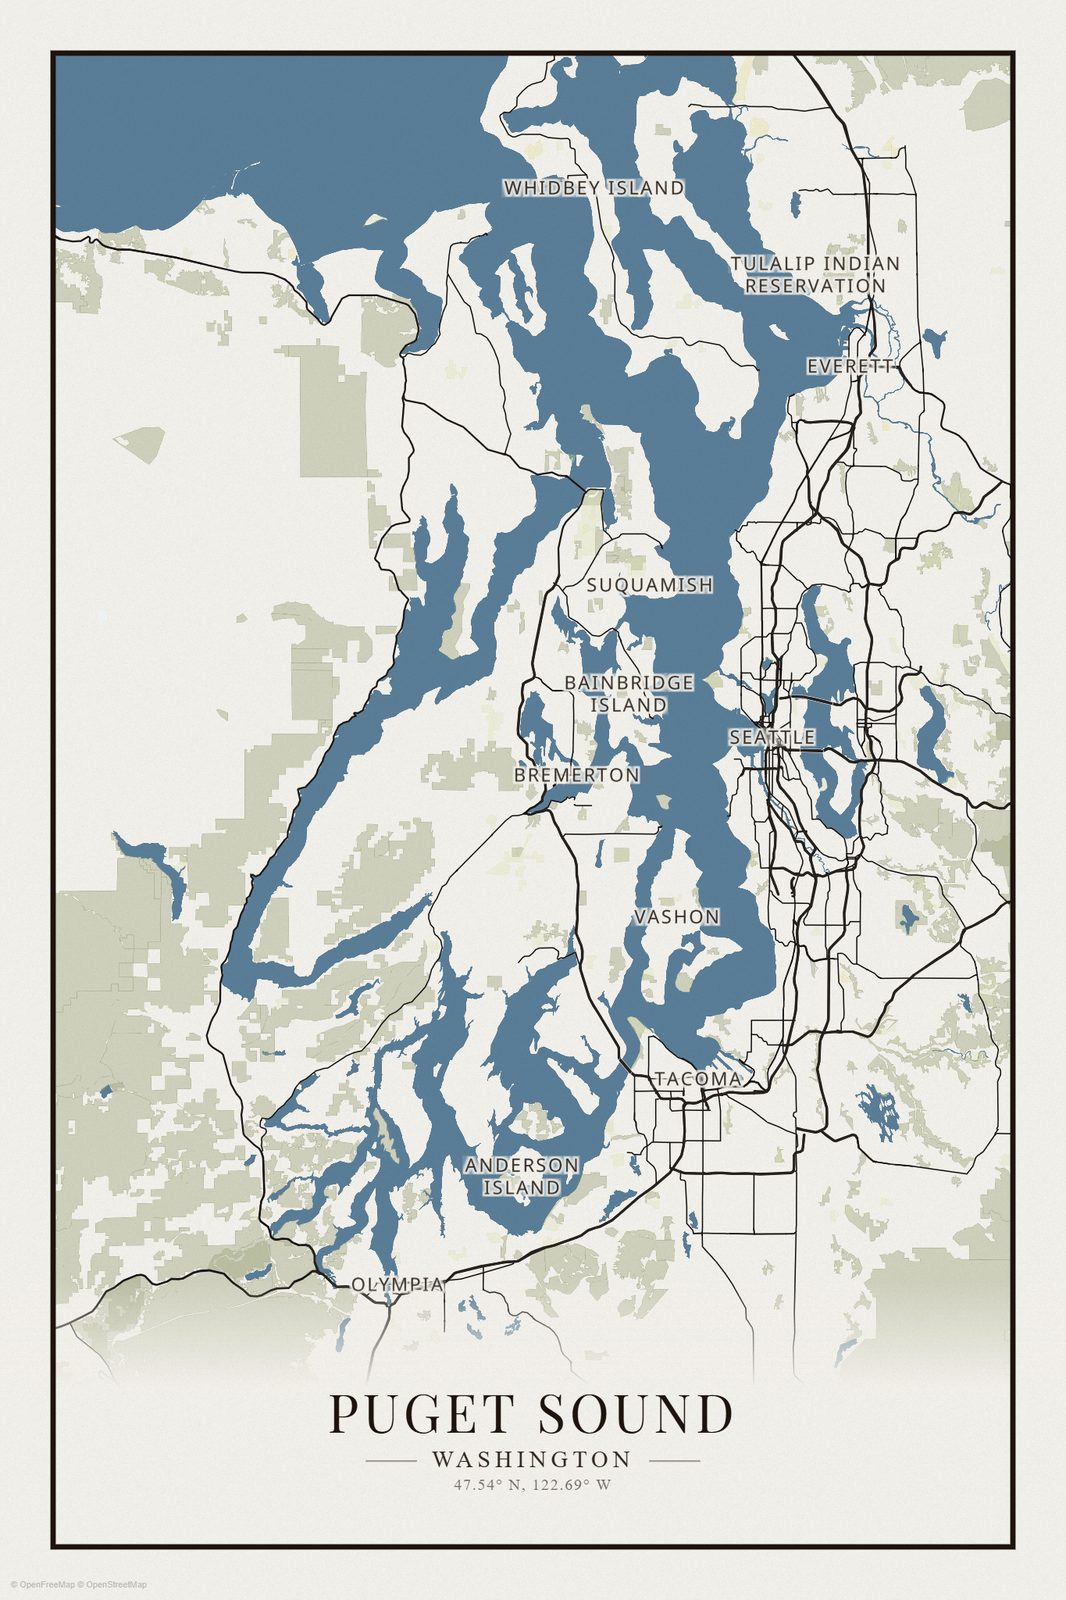
Roads and places: the city grid
The road treatment emphasizes streets, cities, and the relationship between them. It is the busiest of the three, and the most rewarding if you want the map to show how places connect. Check that small roads and labels remain legible at your intended print size.
Open the roads map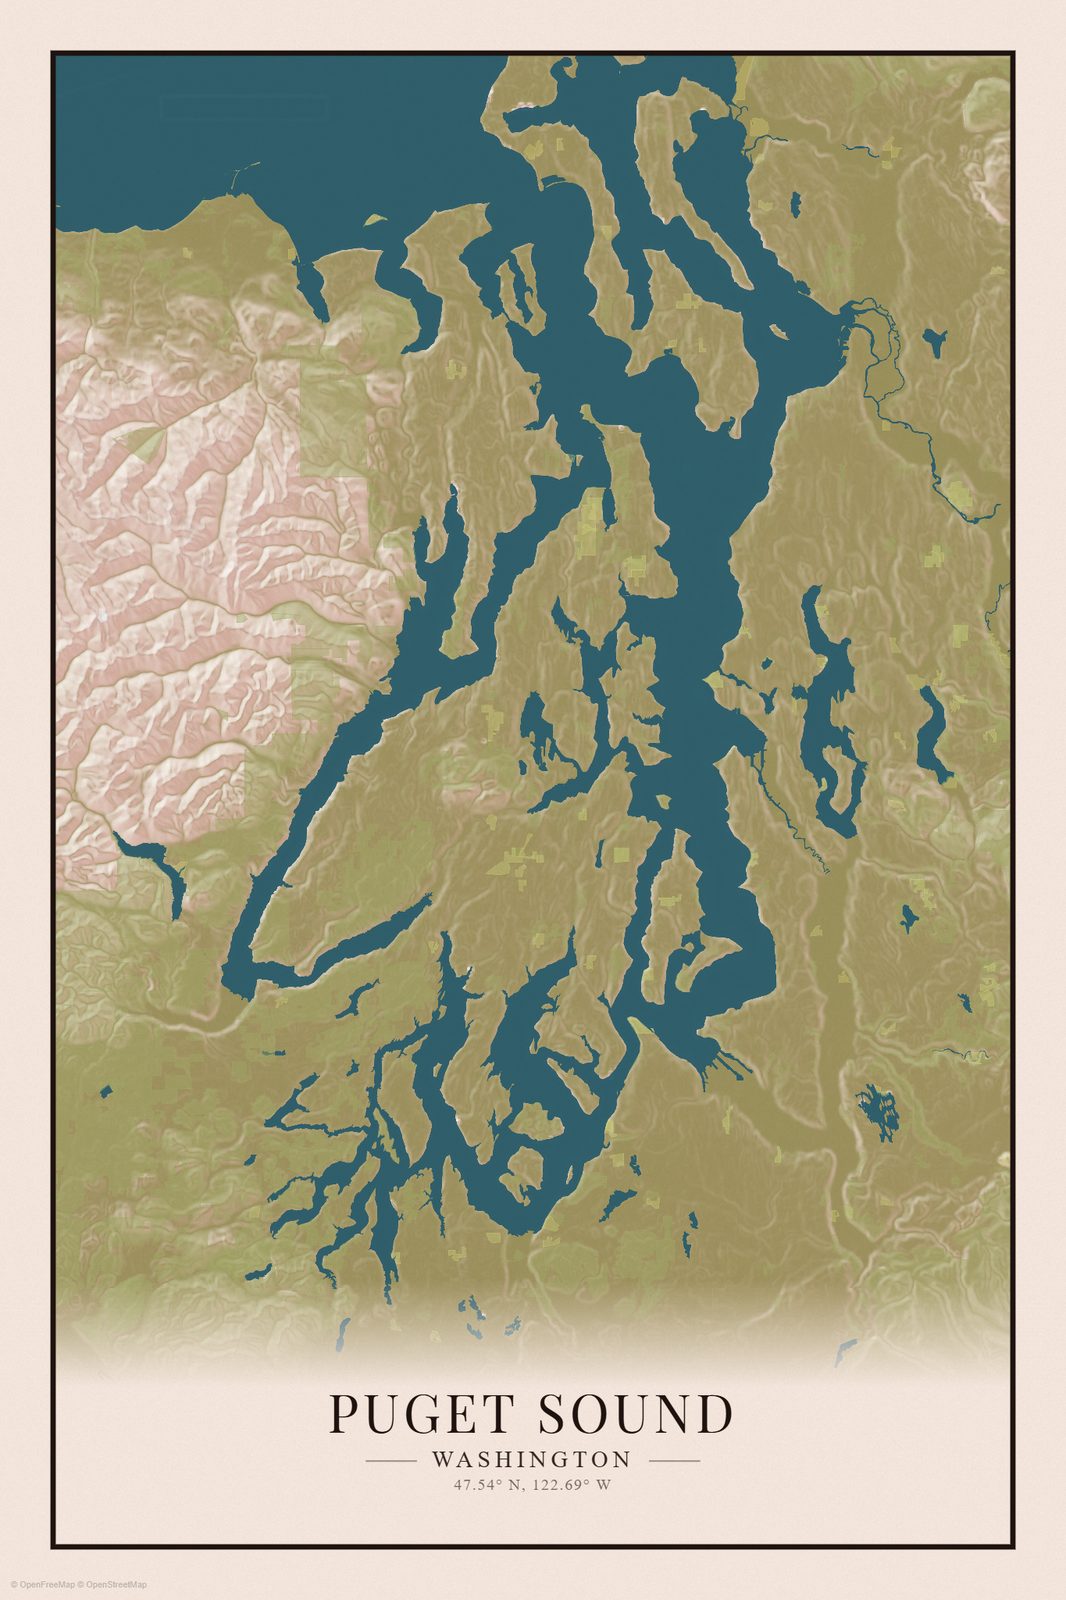
Terrain: the landscape around the water
The terrain treatment emphasizes the land the water is cut into. Relief and land cover add depth, but they can also soften a shoreline. Check that the contours around your favorite inlets are still crisp before you export.
Open the terrain mapPick the one that matches the wall
The three do different jobs. Minimal shoreline is the most forgiving at small print sizes and in busy rooms. Roads and places reward close looking and a larger frame. Terrain reads as landscape art and suits a room that already has a lot of texture. Open each composition and flip between them before you commit: shoreline · roads · terrain.
Make the map yours
Every map in this post can be changed. Work in this order and you will spend your time on the decisions that matter:
- Set the framing. Choose the whole sound, the Seattle area, or an island view. Leave a little breathing room around the features that matter most.
- Choose your colors. Check that roads, land, and water remain distinguishable. A pale palette can look different on paper than on a bright screen.
- Add a title. Keep “Puget Sound,” use the name of your island or neighborhood, or choose a personal title such as “Our Salish Home.”
- Inspect the result. Look at small text, thin roads, and the edges of the composition before exporting.
The example below uses a close crop of Winslow and Eagle Harbor with street names and a personal subtitle. It is the same treatment as the Bainbridge map above, taken in far enough that individual streets become the subject.
Downloading and printing your map
Carto-Art exports your map as a digital PNG image. You can print the file at home or send it to a print provider. A download does not include a physical poster or frame.
Choose your intended paper size before exporting. Match the image's aspect ratio to the print: fitting a portrait image into a wider frame will require cropping or borders.
For example, a 12 × 18 inch print at 300 pixels per inch needs a 3,600 × 5,400 pixel image. That is a sizing example, not a guarantee for every export setting. Check the dimensions of your downloaded file and your printer's requirements.
At print sizes, fine street labels are the first thing to become hard to read. If the small text matters, preview the design at your intended size, or choose a tighter crop with fewer labels before exporting.
Ask the printer to preserve the full image if you want to keep the entire shoreline and title. Review any automatic crop before ordering.
Free exports are available within the current plan limits; your account page shows what your plan includes.
Questions about your Puget Sound map
Which islands and shorelines does each map include?
The whole-sound view includes Bainbridge, Vashon, and the Kitsap and Key Peninsula shorelines, with Whidbey partially in frame at the top; the Strait of Juan de Fuca and the San Juan Islands are outside it. The Seattle and Eastside view covers Seattle's central and north neighborhoods, Lake Union, Lake Washington, Mercer Island at its southern edge, and the Eastside cities; the Kitsap Peninsula is outside this frame. The Bainbridge and Kitsap view includes the island's north end, the Kitsap Peninsula, and the Seattle waterfront. Each customize link opens the exact extent shown, and you can move or zoom from there.
How do I emphasize a particular shoreline?
Center the shoreline you care about, then zoom in until it occupies roughly half the frame. Leave enough water and neighboring land in view to make the location recognizable, and turn labels on if the names matter more than the street pattern.
What stays legible at print sizes?
Large place names and the title survive most print sizes. Street names and thin roads need a closer crop or fewer overlay elements. The road and terrain versions of the whole-sound map are the busiest treatments; if you print small, the minimal shoreline version stays the most readable.
Can I make a map of just my neighborhood?
Yes. Start from the nearest regional view, then move and zoom the map to frame your area. The personalized example above is a close crop of Winslow and Eagle Harbor on Bainbridge Island. Include some shoreline or a familiar road if you want the finished print to remain easy to place geographically.
Can I change the design before downloading?
Yes. Every customize link opens the same composition in the editor. Adjust the area, colors, and title, then inspect your finished map before exporting.
Create your Puget Sound map
Start with the whole sound, or choose a closer view of Seattle and the Eastside. Make the framing your own and download the result when it looks right.


